I first came across Little Windows through the marvellous resin jewelry video tutorials by Fran Valera, the highly creative artisan and owner. She has many innovative resin products as well as inspiring tutorials on her site. I picked a selection of my favorites in this past post - Really Cool Photo Resin Jewelry Tutorials.

Coloring resin is possible with dyes. I have come across tips on using artist crayon shavings. Liquid color agents like acrylic paints are not recommended as they could affect the polymerization of 2 part epoxy resin. So Little Windows now offers gorgeous resin films - superior to using dyes because they do not cloud over embedded objects nor do they bleed. I received sample packs of jewel tones and the lighter tints.

As you can see from the snowflake pendants I made above, these resin films really help make beautiful resin pieces with colorful backgrounds. The pendant on the top right was the only one created without resin film - the snowflake rests on a sprinkle infused resin bed. Different look as the snowflake element was not as sharply demarcated.
The snowflake jewelry tutorial will be out later this week. The resin films are quite thin and light. I found they scratched easily but that did not appear to make any different when used in casting. Static cling was an issue at this time of year. But the dust was easily removed using a Swiffer duster.

I found I could get away with cutting out small shapes using small punches but cutting out larger pieces really needs Fran's suggestion of sandwiching the film with some scrap paper folded in half. Otherwise the punch distorts the resin film and doesn't cut it properly.
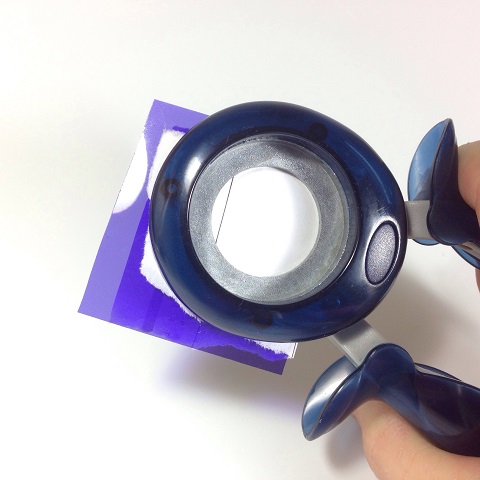

I also received a spiral rachet or spring drill for review. This is a new item for Little Windows. While the electric drill is very fast, many people prefer to use manual drills for better control when making holes (for jump rings etc) in softer materials like resin. My review comparing this drill with a simple hand drill on different materials will appear later this week.

I also bought a few items from Little Windows. The doming trays are excellent. They do a great job of supporting pieces during the doming process. I used to use wax paper before. Any accidental spills tend to flow into the spaces between the pegs. As you can see below, I had a resin tsunami at one point!

While resin spills can be sort of removed using a wooden skewer before they set, they can also be left as they are. What I should have bought was the silicone doming tray shown below. Nothing really sticks to silicone so spills can be popped out later.

I was also impressed with the resusable molds I bought from Little Windows. I used the medium set for some of my snowflake pendants. The molds are precoated with release agent so the casted discs were easily removable. If you use regular molds, you will need a spray on release agent. The alternative is to buy silicone molds which does not need any release agent.

I did not buy any 2 part epoxy resin from Little Windows. That's because I already had some on hand. Most if not all brands of good 2 part epoxy resin give a crystal clear finish when you combine the two parts together and it polymerizes to a hard substance. The problem is with the shelf life of the hardener portion (B). As you can see below, my Ice Resin B solution (on the right) had gone quite yellow because it was old. So when combined, the mixture was also yellow and not useable. The brand on the right was fresher. While its B solution was slightly yellow, it was still fine to use as the resulting mixture was clear.
 Little Window's resin brand is very different from any I have encountered before. Instead of the usual 1:1 mix, the proportion is 2:1 of A:B. Fran says the shelf life is 3x longer. What is especially useful is the ability to buy just the part B if it yellows with age. I have never encountered such a cost saving option before. Since I don't do resin jewelry that often, this is of great interest to me.

Giveaway
This giveaway is for US and Canadian readers only.
Extra entries if you become or are a blog subscriber or follower etc. If you also do shout outs about this giveaway, those will count as additional entries too! Please say so in the comments.
It ends in a week's time at 6 pm EST Monday, January 5, 2015 . I will pick the winner randomly and announce the results as soon as possible after. So be sure to leave a contact email if you don't have an online link or make sure you come back and check! Otherwise I will redraw in a week. Good luck!
Coloring resin is possible with dyes. I have come across tips on using artist crayon shavings. Liquid color agents like acrylic paints are not recommended as they could affect the polymerization of 2 part epoxy resin. So Little Windows now offers gorgeous resin films - superior to using dyes because they do not cloud over embedded objects nor do they bleed. I received sample packs of jewel tones and the lighter tints.
As you can see from the snowflake pendants I made above, these resin films really help make beautiful resin pieces with colorful backgrounds. The pendant on the top right was the only one created without resin film - the snowflake rests on a sprinkle infused resin bed. Different look as the snowflake element was not as sharply demarcated.
The snowflake jewelry tutorial will be out later this week. The resin films are quite thin and light. I found they scratched easily but that did not appear to make any different when used in casting. Static cling was an issue at this time of year. But the dust was easily removed using a Swiffer duster.
I found I could get away with cutting out small shapes using small punches but cutting out larger pieces really needs Fran's suggestion of sandwiching the film with some scrap paper folded in half. Otherwise the punch distorts the resin film and doesn't cut it properly.
Resin jewelry making requires patience more than anything else. So rushing just introduces errors (Who me?). Fortunately mistakes can be recovered in the early stages by removing the film and wiping away the unpolymerized resin with paper towels soaked in isopropanol (rubbing alcohol from the drugstore)..
I also received a spiral rachet or spring drill for review. This is a new item for Little Windows. While the electric drill is very fast, many people prefer to use manual drills for better control when making holes (for jump rings etc) in softer materials like resin. My review comparing this drill with a simple hand drill on different materials will appear later this week.
I also bought a few items from Little Windows. The doming trays are excellent. They do a great job of supporting pieces during the doming process. I used to use wax paper before. Any accidental spills tend to flow into the spaces between the pegs. As you can see below, I had a resin tsunami at one point!
While resin spills can be sort of removed using a wooden skewer before they set, they can also be left as they are. What I should have bought was the silicone doming tray shown below. Nothing really sticks to silicone so spills can be popped out later.
 |
| Little Windows' Silicone Doming Tray |
Keeping molds and bezels level is crucial when casting resin. My bezels were best placed with the hanging loop off the edge of the tray - this was no different from me putting them like so on a wooden block or box. But for other bezels, the hanging loops might drop down inbetween the doming pegs so they can be placed anywhere else.
I was also impressed with the resusable molds I bought from Little Windows. I used the medium set for some of my snowflake pendants. The molds are precoated with release agent so the casted discs were easily removable. If you use regular molds, you will need a spray on release agent. The alternative is to buy silicone molds which does not need any release agent.
I did not buy any 2 part epoxy resin from Little Windows. That's because I already had some on hand. Most if not all brands of good 2 part epoxy resin give a crystal clear finish when you combine the two parts together and it polymerizes to a hard substance. The problem is with the shelf life of the hardener portion (B). As you can see below, my Ice Resin B solution (on the right) had gone quite yellow because it was old. So when combined, the mixture was also yellow and not useable. The brand on the right was fresher. While its B solution was slightly yellow, it was still fine to use as the resulting mixture was clear.
 |
| Little Windows Resin Hardener Replacement |
Check out Fran's fun resin film blog post and watch the video. I used it as a guide and added more tips for my full snowflake jewelry tutorial. I didn't buy her beautiful special films for the dichroic look but used something else instead. Can you guess what it is?
Giveaway
This giveaway is for US and Canadian readers only.
Extra entries if you become or are a blog subscriber or follower etc. If you also do shout outs about this giveaway, those will count as additional entries too! Please say so in the comments.
It ends in a week's time at 6 pm EST Monday, January 5, 2015 . I will pick the winner randomly and announce the results as soon as possible after. So be sure to leave a contact email if you don't have an online link or make sure you come back and check! Otherwise I will redraw in a week. Good luck!
Before You Go:
- Exquisite Wire and Resin Kanzashi Flower Hair Jewelry
- How to Make Butterfly Resin Earrings Tutorial
- How to Make Lace Resin Jewelry Tutorial
______________________________
Original Post by THE BEADING GEM
I haven't heard of little windows before this is great info and that resin film sounds very interesting. I will check out the website for more info. thanks for the chance to win a prize.
ReplyDeleteI would absolutely love to try some os these new resin components.
ReplyDeleteI would love so much to win this!
ReplyDeleteI have never worked with resin before so this would be the perfect opportunity to try it!!!! I will have to check out Little Windows site!!!!
ReplyDeleteI will definitely have to check her site out. I have been wanting to try making some resin jewelry but never can find any resin.
ReplyDeleteThanks for the chance to win.
Forgot to tell you I am a blog follower.
ReplyDeleteThanks for the info. I am just getting into working with resin, Can't wait to experiment!
ReplyDeleteLove it!
ReplyDeleteI love working with resin! I have purchased from Little Windows in the past & I especially love the silicon doming tray. Their molds are also great.
ReplyDeleteResin is on my bucket list to learn for 2015. This would be a nice win!
ReplyDeleteDonna J. Smith
Ddonnasmith1@aol.com
Wow, I checked out their site. Lots of tutorials and ideas. Would love to get into resin. Thanks for the giveaway.
ReplyDeletePlease enter me to win this awesome resin giveaway. Thank you, Julie
ReplyDeleteI've played around with resin a bit. I really wish I had that silicone mat.
ReplyDeleteDonna Levy
beadafuldesignsbydonna.com
This looks like lots of fun. I'd love to win and try it.
ReplyDeleteI'm a blog follower.
ReplyDeleteI have been wanting to try resin!
ReplyDeleteI have been wanting to try working with resin for a long time. I hope to try it this year. I always love your posts and look forward to them. You help expand my jewelry making world both here and on facebook !
ReplyDeleteHappy almost New Year Pearl!
ReplyDeleteAnother fun giveaway! I am a blog follower and posted your giveaway offer on my Pinterest Contest and Giveaway board.
zanc@att.net
Zan
I've always wanted to try resin, would love to win this! :)
ReplyDeleteI haven't heard of Little Windows before, I would love to try the film and that silicone mat. Great giveaway!! I am a blog subscriber via feedly.
ReplyDeleteThis sounds like it has amazing potential for fun!
ReplyDeleteReally a cool product.
ReplyDeleteI've been very curious about resin jewelry and wanted to try it. This contest is perfect, thanks for the opportunity! I'll pin this to my "Contest" board on my Pinterest page.( After I go check out the Little Windows site). :)
ReplyDeleteI have eyeing resin projects for a while now. This would be a great way to get started! Thanks!
ReplyDeleteWhat a great review of the products! Thank you. I appreciated your authentic commentary, and I got some new ideas. The resin film is something I definitely want to try!
ReplyDeleteHappy blog subscriber, here :) I would love to try these!! butterfleye919 at aol. com
ReplyDeleteI'd love to learn to use these items and incorporate them into my current jewelry making style. I'm hoping I win. Thanks
ReplyDeleteAre you kidding me Pearl?!
ReplyDeleteResin is on my list of things to learn. However - you know the problems of where I live - the cold. The incredible cold.
Learning to do resin at this time of year - and leaving it to harden over ? many hours at ? temperature. It's not going to happen.
I had no idea that Ice Resin goes yellow if left too long. Grrrrr! Thanks for letting me know. Now I'm going to have to go have a look at mine. Grrrr! I've got issues with that.....
Now - Little Windows just looks incredible! They have So Many things that are wonderful!
So throw my name in there! I'll give it a whirl!
I've heard about Little Windows before but haven't had the opportunity to work with it. Thank you for this wonderful opportunity!
ReplyDeletenj.brand@gmail.com
What an informative post! I have heard of Little Windows but don't own any of their products. I do love working with resin but don't do as much as I should. I love the sound of their products! Especially the doming tray! Genius! I would love to win and that would be the first thing I buy!
ReplyDeleteI am also a blog follower!
ReplyDeleteHave only dabbled in resin, but this would be so nice!
ReplyDeleteMarlene Strait
mlsjewel@yahoo.com
I've played with resin in the past and this would give me an opportunity to do some more! Thanks for the chance
ReplyDeletejerriewall@hotmail.com
This would be the perfect chance to play with resin since I have not ever tried it. I am a blog subscriber.
ReplyDeleteWould love a chance to try out Little Window's products. Thanks Pearl.
ReplyDeleteWhat cool products! I just made some resin pendants today. It would've been fun to have had these products.
ReplyDeleteThat resin looks great for jewelry. That is my love right now. Also like the little drill. I have to run out to the garage everytime I want to put a hole in something.
ReplyDeleteLittle Windows a great site! I've been looking for supplies like these, as well as the problem-solving ideas.
ReplyDeleteLove your blog, Pearl. It's a really good source of inspiration and I always read it first thing. Thank you for doing what you do!
I follow your blog ALWAYS!
ReplyDeleteThank you for the opportunity! I am just starting to learn this process and the goodies would be a great starting point.
ReplyDeleteLinda
Aquila Ranch
This review was very interesting. I have done a little resin trinkets over the past couple of years, but never even thought about having a special tray to help and colored backgrounds. I usually just get a bezel and put something simple into it and top it off. My creative juices are flowing and now I'm going to type this and go play. Love the fact that she sells the resin bottles separately, because I too have never seen it and never in those sizes.
ReplyDeleteThank you for the information and to enter this giveaway!
ReplyDeletevkiss@nethere.com
This is a goal in 2015. To learn and become efficient in resin. So many possibilities!! Great info. Thanks for the chance to win.
ReplyDeleteI would love to try some of Little Windows products. The tray especially interests me
ReplyDeleteOh I live Little Windows shop, have been front over the tray for a while! Thank you for the chance to win.
ReplyDeleteKarenra1@cox.net
Would love to win. Saving money to order from them thank you
ReplyDeleteI have been wanting to try making resin jewelry for some time now but was a bit intimidated by it. These tutorials have taken away my fear! I am going to order a kit and get started right away! Thank you!!
ReplyDeleteWow, I just started using Little Windows products and want to order more. Thank you for the information about the drawing. It would be great to win this lovely prize. I am experimenting with doming on fabric.
ReplyDeleteI am a subscriber too!
http://IsleOfCraftin.etsy.com
I have used Ice Resin for several years. A few months ago, I purchased Little Windows Resin and experimented with it. I think it is an excellent Resin! After using it, I have switched to using Little Windows exclusively. The results are very impressive. I even did three youtube videos of my experiments with Little windows to share with my friends. I was thinking outside the box, and found that Little Windows is much more versatile, drys sooner, and so much more! It is just as "Jewelry Grade" as any other Resin. I am looking forward to creating more using this product.
ReplyDeleteNew tools to have fun with. Thanks for the reviews.
ReplyDeletewncon@aol.com
Very interesting post and thanks for the contest!
ReplyDeleteAlikat2004 at ravelry.com
Beautiful creations and I would love to try making some unique resin jewelry!
ReplyDeleteI'll definitely have to try Little Windows. I don't do resin often, so a longer shelf life is a definite plus!
ReplyDeleteHave wanted to try to do resin projects for awhile. This would be a great.motivator to try it! I have only used diamond glaze in the past, but would like something more long lasting. Thanks!
ReplyDeleteAbsolutely beautiful! I love creating with resin, and winning this would be awesome. Love the doming tray too!
ReplyDeleteGreat tutorial!
ReplyDeleteMom this is sooo cool!
ReplyDeleteWonderful tutorial. Thanks
ReplyDeleteI would love to make for my Operation Christmas Child shoeboxes
ReplyDeleteThat resin mat from Little Windows might just be the answer to my over flow of resin. I love resin but I always over flow it, most of the time very hard to remove. Thanks for the info. robertnme2@aol.com Roberta Godfrey-Darr
ReplyDeleteThis would be great to be able to get some supplies so I can learn how to make resins thank you for the chance :-) my email is ariamayasmomma@yahoo.com or Katyann Marne Driver on facebook thanks
ReplyDeleteTrying resin is one of my new years resolutions. Would love to win! grinchswoman@hotmail.com
ReplyDeletewwow this is so amazing my sister and i would totally love to try these out thanks for the chance and happy new year! email is bribrimarieshanley@gmail.com
ReplyDeleteI would love to try my hand at this! The photo ones are so beautiful!
ReplyDeletelshumack at gmail dot com
I've wanted to try resin casting for a long time, and I'd love to give it a shot! Thanks for the chance! anaimless1@gmail.com
ReplyDeleteI would love to win
ReplyDeletedlatany at gmail dot com
https://www.facebook.com/latanya.thornhill/posts/10101784828236828
ReplyDeletedlatany at gmail dot com
https://twitter.com/sweetums82/status/552100228170387458
ReplyDeletedlatany at gmail dot com
Yay! Great giveaway!
ReplyDeletehrddiana556@gmail.com
This would be so fun to win and make with my nieces. Great job, by the way.
ReplyDeleteshare:
ReplyDeletehttps://twitter.com/dlw447/status/552136309368561665
I would love to win this! I would love to be able to make this with my kids.
ReplyDeleteHow neat!! My girls would love to try this with me. - daniellecorrelle@aol.com
ReplyDeleteOooh I'd love to learn to make resin jewelry! this looks like a great set up
ReplyDeleteThis would be right up my alley. I would love love love to win. Thanks for the chance.
ReplyDeleteMy granddaughter loves to create things. Im sure she would love this with her teen friends
ReplyDeletewould love to win. eclairre at ymail dot com
ReplyDeleteI checked out their site. Lots of tutorials and ideas. Would love to get into resin jewelery making. calgrl76 at hotmail
ReplyDeletelove to win this for my little niece. thankyou, ken pohl19@comcast.net
ReplyDeleteI would love to be able to do this! Thank you for the opportunity to win!!! trelharrington1@gmail.com I am a blog follower! I love your site!
ReplyDeleteI love little windows website and the doming mats are wonderful. lots of info. bobbie g. robertnme2@aol.com
ReplyDeleteWow! Little windows is the best! So mutch info and wonderful things!If I win I have a adress in WA. But I live in Sweden 😉 anna20044@hotmail.com
ReplyDelete