That got me thinking about doing the same but for my laser cut wood pieces - I make them in all different shapes. Her idea does definitely work for wood as you will see from my experimentation below.
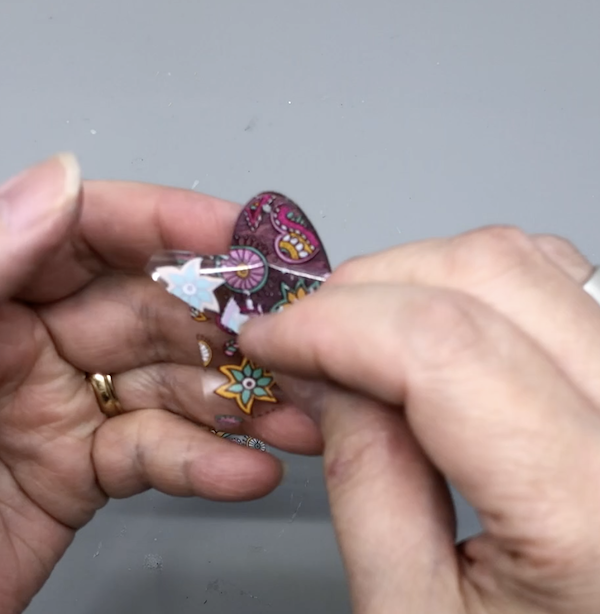
The process is actually very easy - glue down the nail foil to the wood and then almost immediately, slowly peel away the backing foil. But first I had to test which glue would work best.
I decided on spray glues because I thought the brush on ones might not be evenly applied. I had three kinds on hand. A strong Gorilla spray adhesive, a spray-on Modge Podge and a light glue used as a sticky note spray - an easy tack or temporary adhesive might work too. You will have to experiment with the glues you have if yours differs from these.
As Susan pointed out - not all nail foils will work. You must choose patterns with clear areas, not solid patterns.
I spent about a minute rubbing. Then I carefully peeled off the foil. I replaced it if I saw the transfer was not complete and continued rubbing. Once the image was fully transferred, I sealed the wood with a couple of coats of spray varnish like Kamar Spray Varnish. Once dry, earring findings are then added.
Only the tacky type of glue worked for me. I am not quite sure why this is the case. Perhaps it is because it's designed to work on flexible surfaces?
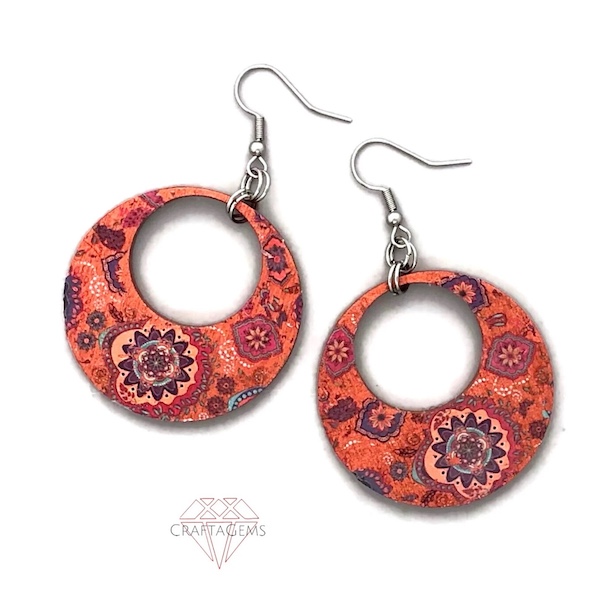
As you can see from my designs for my CraftaGems, you can place the designs symmetrically or not!
Here is my video on the whole process on my TikTok - and the same thing soon on my Instagram. Just the music is different!
@beadinggem Use nail foil to make easy printed wood earrings! #beadinggem #tutorial #jewelrymaking #crafty #craftdiy #earrings #woodjewelry #jeweryprocess #jewelrydiy ♬ I'M FEELING LUCKY - Ellen Once Again
Photography
I used my iPhone 8+ for final product photography in natural light. I used the Orangemonkie studio which comes equipped with LED lights - for artificial light photography and videos in my windowless basement studio. The Foldio2 Plus is excellent . I use the Foldio3 because I need the room for tutorial photography. My online class Easy Guide to Smartphone Jewelry Photography is now available. Read more about it here.
Before You Go:
- How to Sand, Stain, Paint and Seal Laser Cut Jewelry Designs
- Fun 3D Printed Jewelry by LayersByDesign
- Translucent Screen Printed Resin Jewelry Tutorial
This blog may contain affiliate links. I do receive a small fee for any products purchased through affiliate links. This goes towards the support of this blog and to provide resource information to readers. The opinions expressed are solely my own. They would be the same whether or not I receive any compensation.
______________________________
Original Post by THE BEADING GEM
EASY GUIDE TO SMARTPHONE JEWELRY PHOTOGRAPHY- Read more here


Those are so cute!
ReplyDeleteSimple but very effective!
ReplyDeleteI have lots of nail film I was using with resin; it came with a nail glue. these are nice! so many patterns to nail transfers!
ReplyDeleteYes, there are tons of nail transfers to choose from. As you have found, they are so useful for resin too.
Delete