One of the most effective ways to come up with unique designs is to use your jewelry components in unexpected ways! Try playing with them - turning them around is one tip. Another is to see if you can add other things to the items. Can you wire something to it? Add bead work, perhaps?
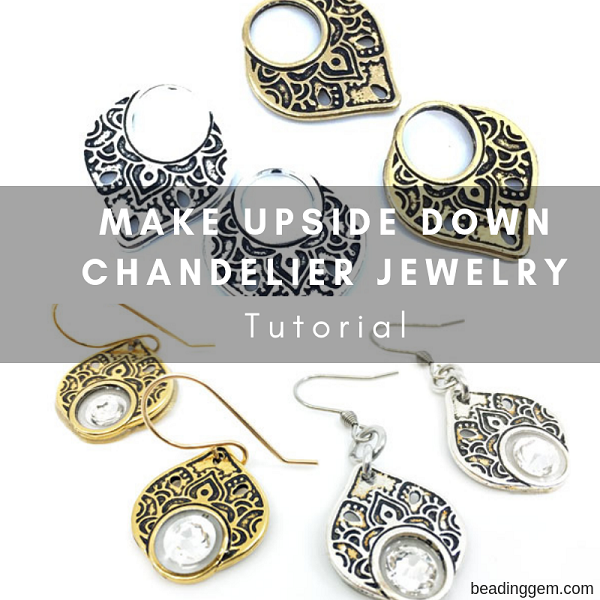
I will share how this tutorial transpired when one idea lead to another. It began when I looked at these beautiful silver and gold plated chandelier findings which I received from TierraCast for review some time ago. You can purchase these from many vendors. The 3 holes at the bottom are clearly for adding dangles. The large holes make it easy to hang the findings from ear hooks.

My first idea was to fill the holes with resin and add crystals. I had some lovely flat back Swarovksi crystals (size SS30) which easily fitted. These are not hot fix crystals. But I realized once the holes were filled, the chandeliers had to be attached to ear wires in a different way. Maybe some wire work. Well, the easiest solution was to turn them upside down and use the holes at the tips!

I cut a piece of translucent contact paper and stuck the chandeliers on them. You can also use packing tape if you have that handy. Make sure to smooth down the components onto the sticky side of the contact paper or tape.

This project was side project to another. Remember that you should have more than 1 project ready to go when you mix resin! That way nothing is wasted. I used Little Window's Brilliant Resin (Little Windows's 15% discount code for readers - : BG1516), mixing up a batch according to the instructions.

Place a small amount of resin mix into the holes, cover and let it cure overnight.
Then add a bit of glue to attach the crystals to that thin resin layer. I like the precision applicator of G-S Hypo Cement for this task. Alternatively, you could apply a little E6000 glue with a toothpick. Many jewelry makers already have this glue so there is no need to purchase another glue if you don't want to.

Once the crystals are securely attached, carefully add just a little more resin around each crystal. Don't cover the crystals.

As always, cover the pieces when curing the resin. Return after 15 mins and pop any late developing bubbles with a toothpick.

I was overly enthusiastic with the resin with a couple of the components so it seeped and covered the hole I needed to attach the earring to the ear wire. So I used a small needle file to make a dent and used my drill which had a small diamond bit attached to complete the job. As you can see from this photo, I was checking to see that I did get through!

Then it is a matter of just attaching the ear wires - with or without extra jump rings!

Don't like using resin? Try adding dangles in the large open holes!
Not all chandeliers will work for this design but the point is to look at and use your components differently! See the links below for more ideas.

Before You Go:
- Use Head Pins and Metal Components to Jazz Up a Donut Pendant
- How to Make a Pendant from 3-Hole Connectors
- How to Make an Easy Pendant from a Toggle Clasp
Disclosure
This blog may contain affiliate links. I do receive a small fee for any products purchased through affiliate links. This goes towards the support of this blog and to provide resource information to readers. The opinions expressed are solely my own. They would be the same whether or not I receive any compensation.
______________________________
Original Post by THE BEADING GEM
Jewelry Making Tips - Wire JewelryTips -Jewelry Business Tips
I turn them upside down all the time and add beads. I made a pair like that last night too. We need to experiment a bit with the looping og beads but it works with most findings
ReplyDeleteGood ideas Pearl!
ReplyDelete