
You can create tatted jewelry with either a shuttle or tatting needle - the latter looks like giant needles. I first learned tatting using the shuttle method when I was 12 by watching my mother. I taught myself needle tatting as an adult when I struggled to remember how to shuttle tat.
For me, I prefer needle tatting as it is easier and faster. If you are having trouble learning how to shuttle tat (or re-learning as in my case), try needle tatting instead. Unraveling needle tatting mistakes is very quick but painstaking with shuttle tatting errors. See the basics of needle tatting in the Aunt Johanne video demo shown at the end.
There are other pros and cons to either tool. You only need one tatting shuttle no matter what thread size you use. But you have to load up the bobbin. This limits you in how much thread you have to work with. Whereas with needle tatting, you work from the main spool so you don't have to continually replenish a bobbin. Tatting needles come in sets. You have to pick the size suitable for the thread or yarn you use.
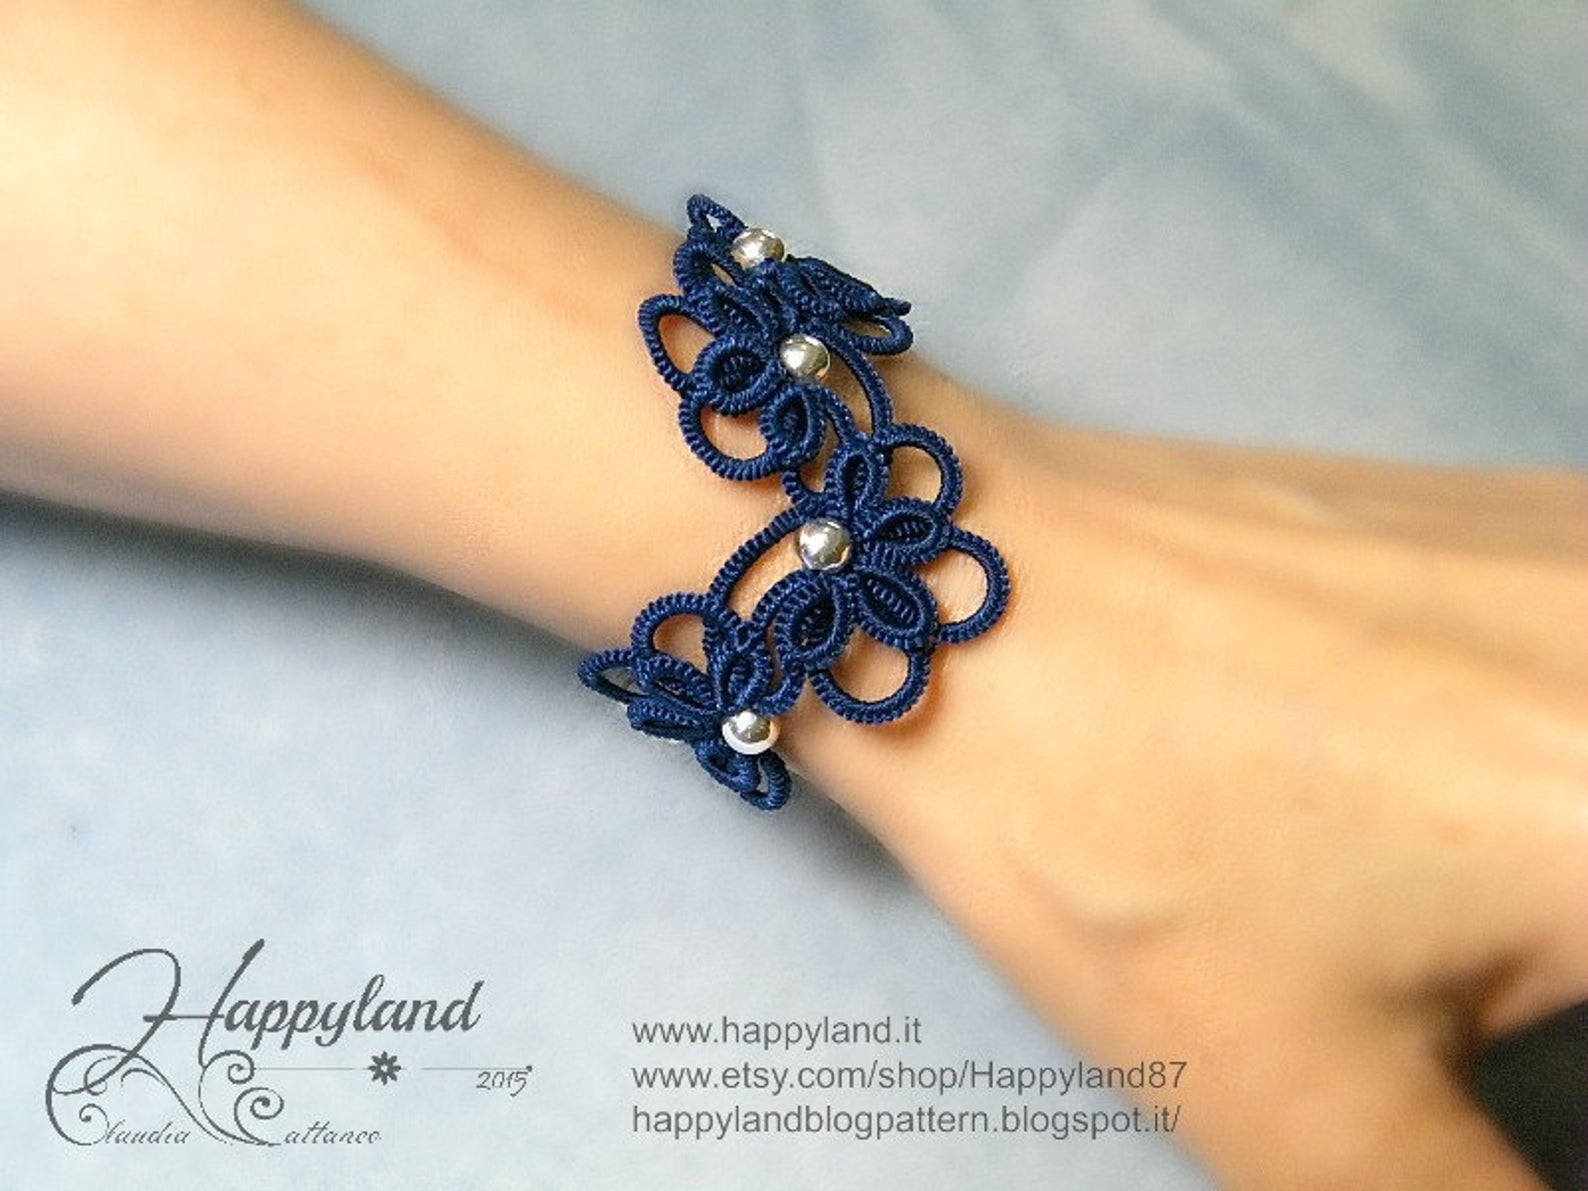
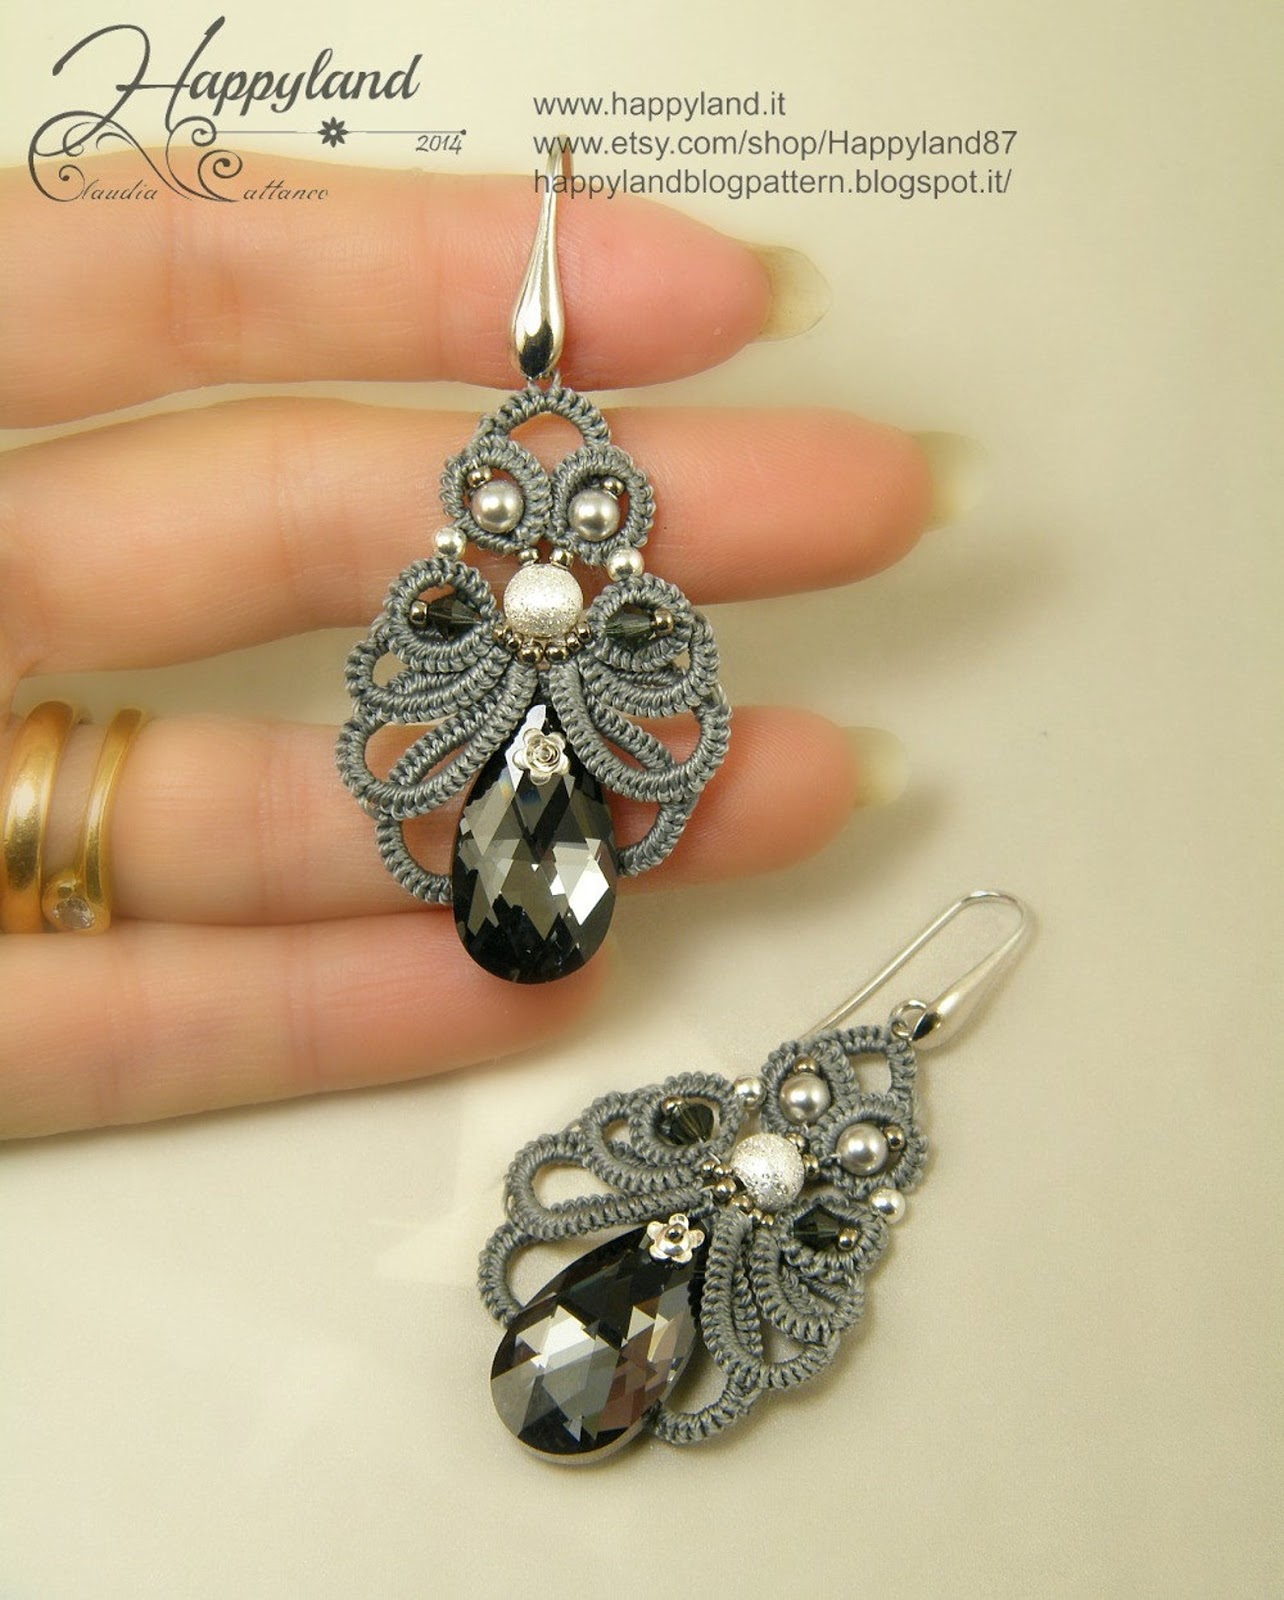
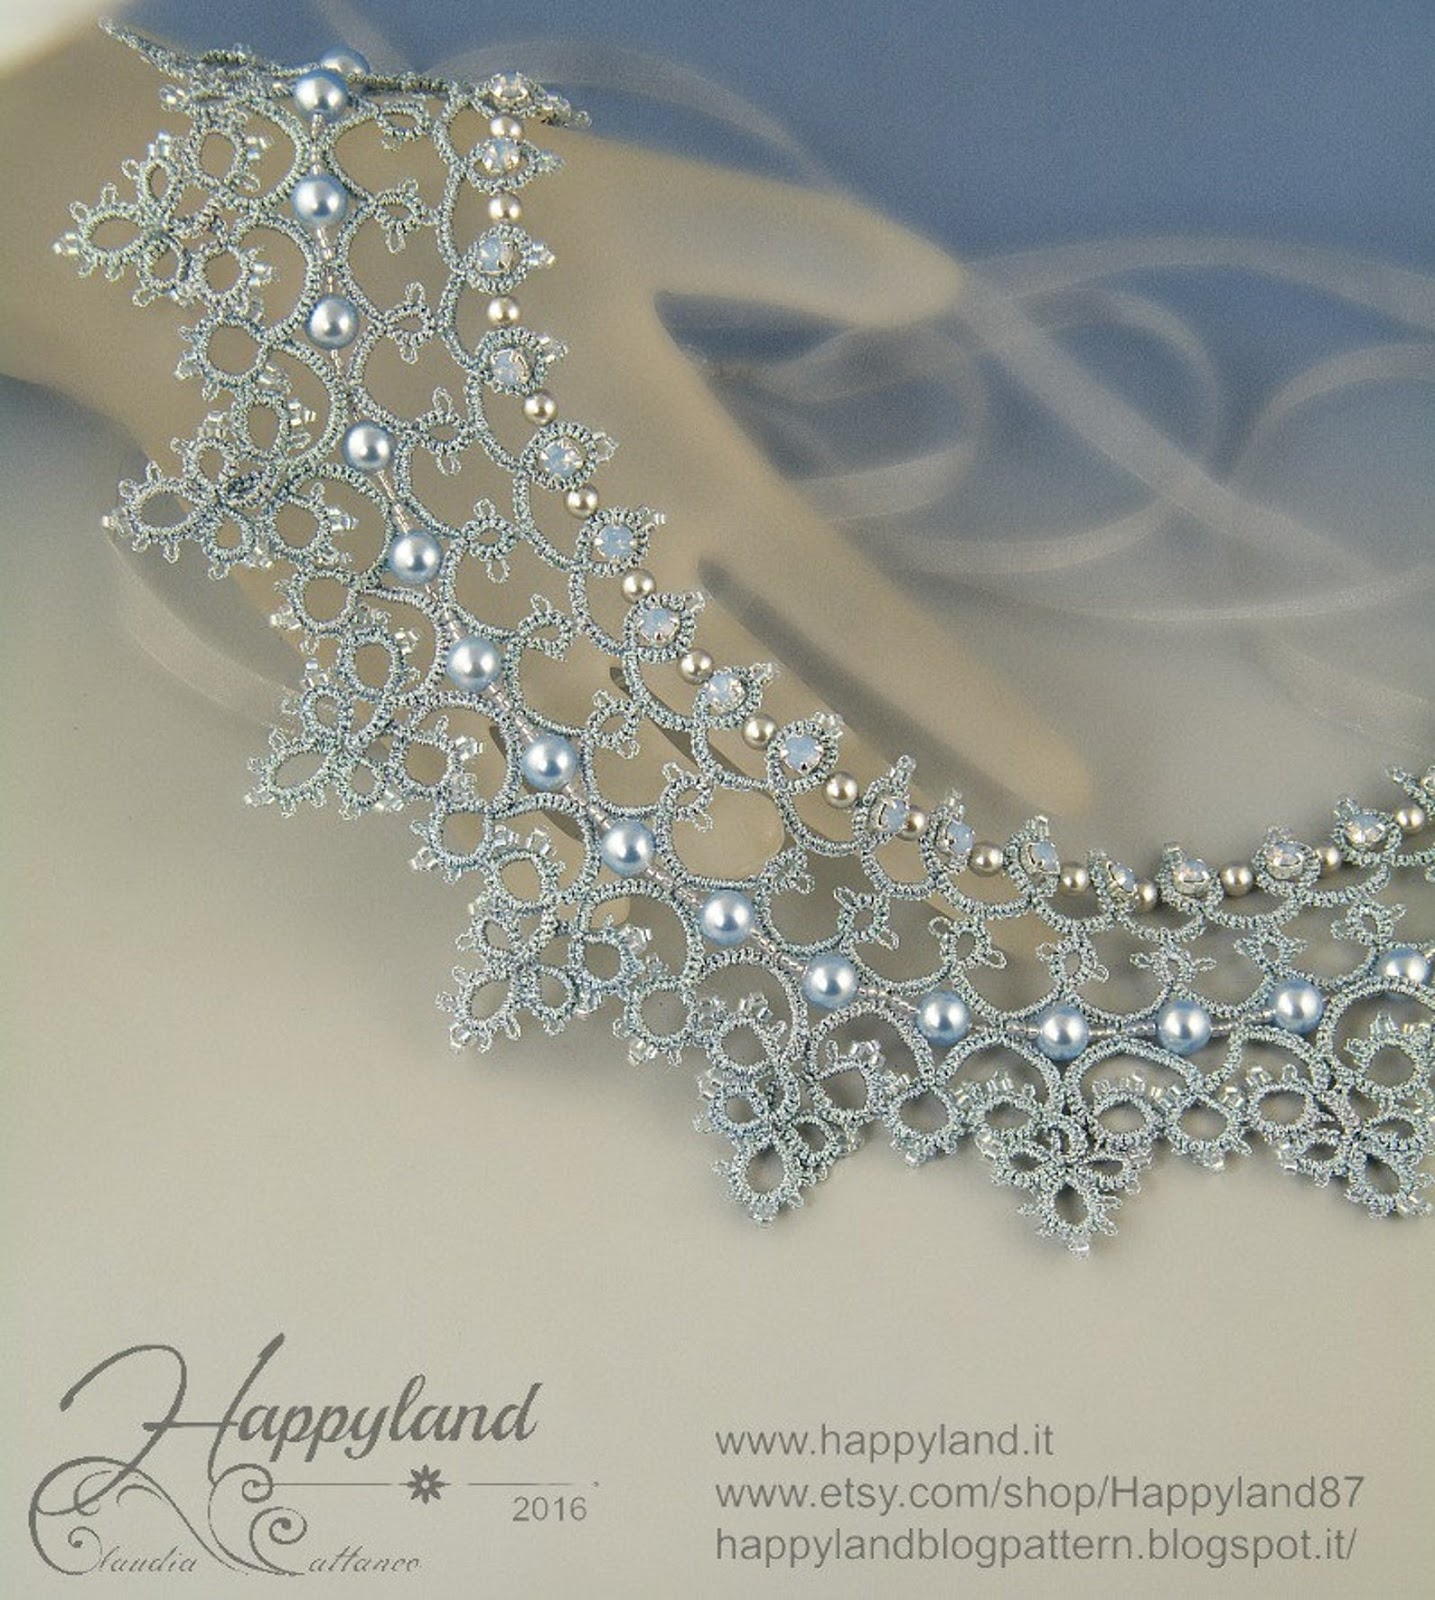
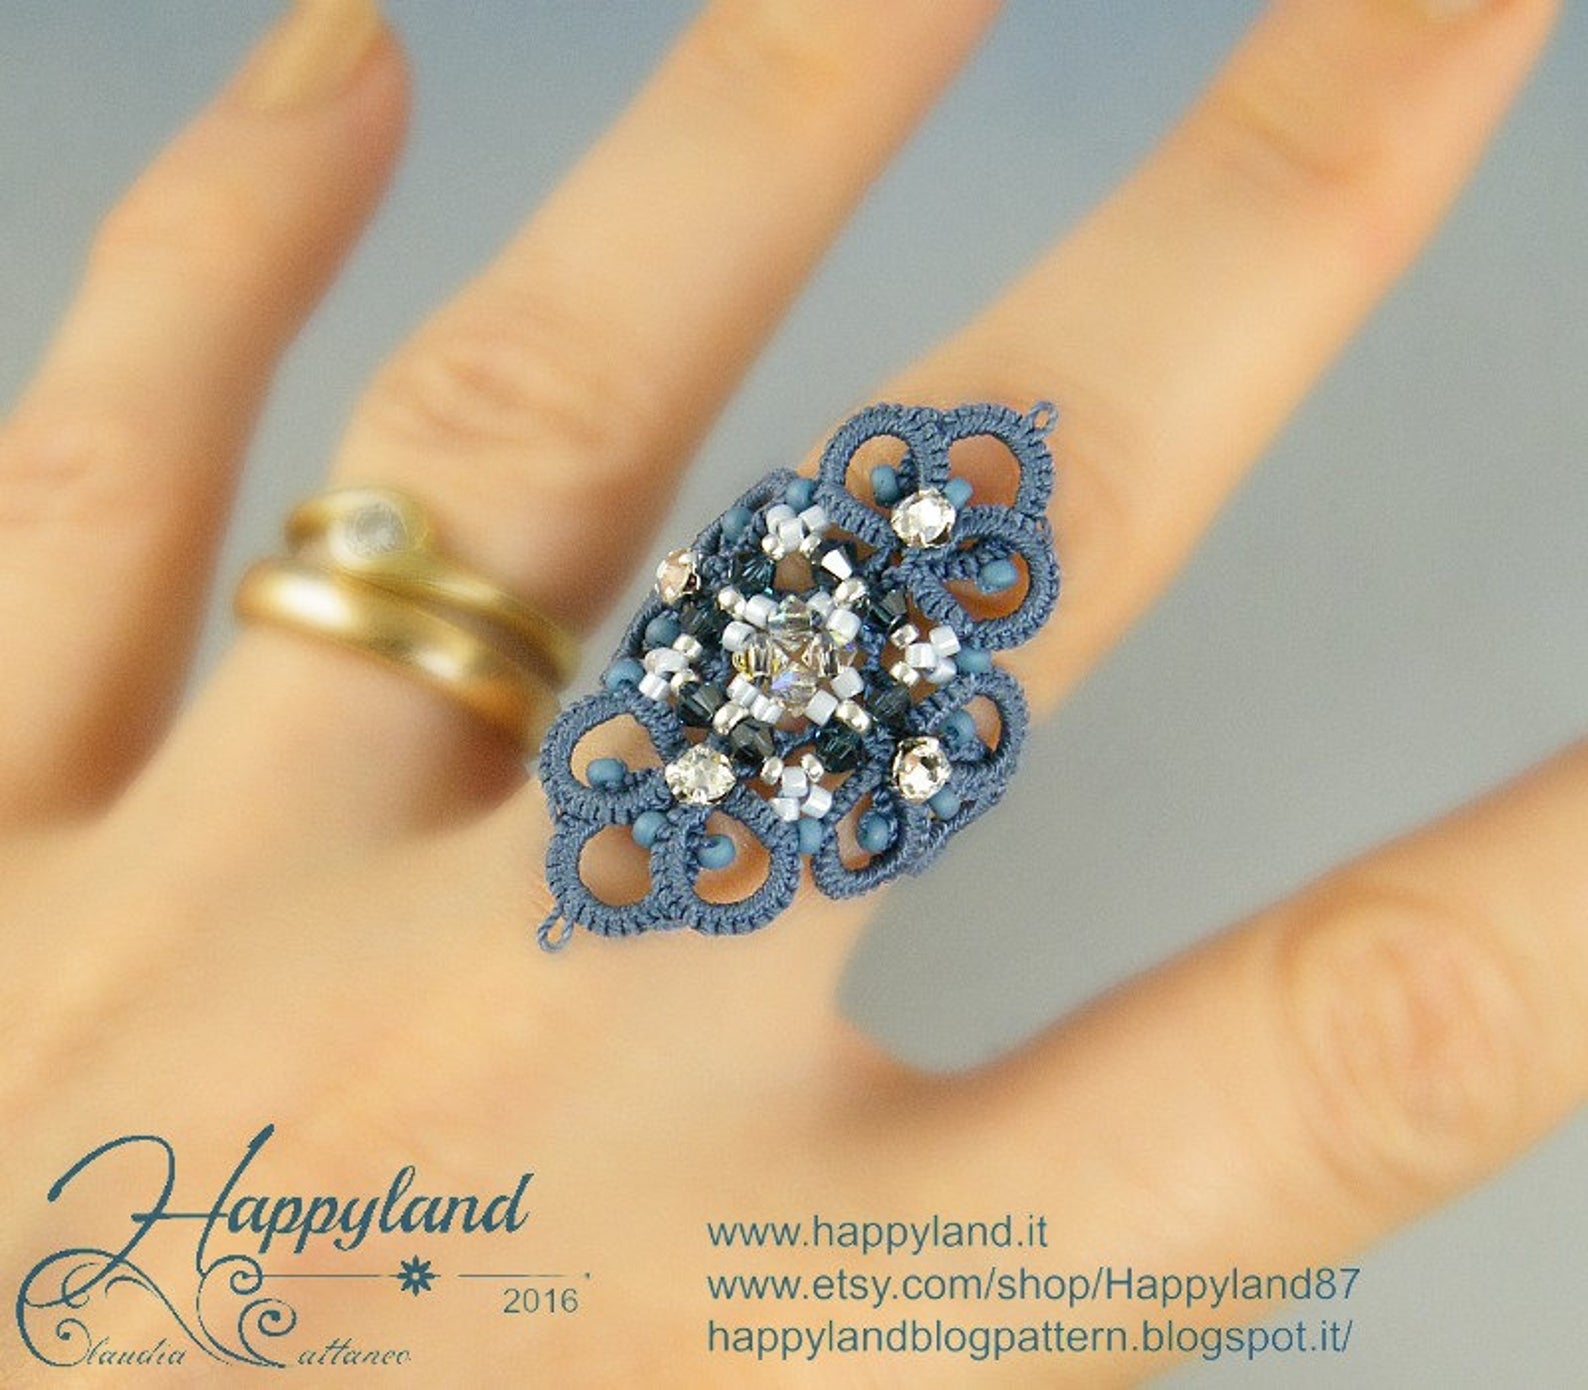
So with the increasing interest with needle tatting, it is a pleasure to showcase the tutorials of the all-round craftswoman, Claudia Cattaneo, of Happyland87. I featured this Italian designer's beautiful macrame tutorials before.
Tatting uses half hitches, familiar to those who do macrame. But the rings and chains with little picots are much more fluid in looks. Claudia has a wonderful way in which she integrates beads and crystals into her designs. Bellissimo, Claudia!


Before You Go:
- Book Review : Tatting with Beads Jewelry
- Marilee Rockley's Shuttle Tatting Craftsy Class Review
- TotusMel - An Amazing Tatted Jewelry Designer
Disclosure
This blog may contain affiliate links. I do receive a small fee for any products purchased through affiliate links. This goes towards the support of this blog and to provide resource information to readers. The opinions expressed are solely my own. They would be the same whether or not I receive any compensation.
______________________________
Original Post by THE BEADING GEM
Jewelry Making Tips - Wire JewelryTips -Jewelry Business Tips
These are incredibly beautiful. Well designed and created! Love them!
ReplyDeleteWhat an amazing technique and the jewelry is gorgeous!
ReplyDelete