
Ever since the dandelions started taking over earlier this year, I have been harvesting, drying and embedding flowers and leaves for making real flower jewelry.
Each time I do that, I experiment and try new things. Here are some of the things I have discovered.
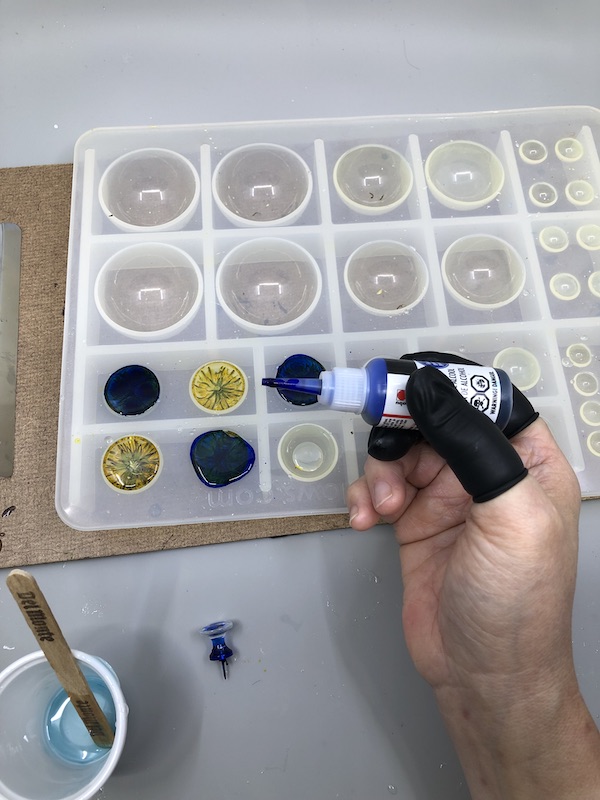
First up are rubber finger cots. I got a bag of black ones after I spotted a polymer clay instructor used them in her videos. They certainly help keep other fingers clean especially for operating the smartphone camera.
I first tried protecting just my thumb and forefinger but it looks like another covered would take care of resin dye accidents. It's really annoying to have dyed fingers for a day or two otherwise.
The ones I got are designed to just roll up each finger. But they were thin and anyone with long nails will soon puncture them. I got, at most, 2 uses out of each. Next time I will get the silicone versions which are supposed to be for protection when using hot glue guns and should last longer. I briefly considered recycling the good tips from ordinary washing up gloves but these were too loose.

With the old cups, I usually measure 20 mL of Part A and 10 mL of Part B for a total batch volume of 30 mL which are easier markings for me to see and mark. The mixing though, had to be in a larger container.
Smaller measurements are now possible for 3 common batch sizes : 9 mL, 15 mL, 24 mL. As you can see below, for 15 mL, the Part A and B markings are much clearer. All the mixing can done in the same cup and clean up for reuse is easier. I much prefer these as I often only need a small batch volume. Smaller batches ensures all the resin will be used up.

You can make clear floral cabochons - I usually do it with 2 resin layers. But if you want to have a dark background, don't fill the molds to the brim but leave enough room to add a third colored resin layer. Best NOT to squirt alcohol inks directly into that third layer. Overflowing happened and I had trouble cleaning up so the cabochons turned out okay.


 Clear Backgrounds


Colored Backgrounds

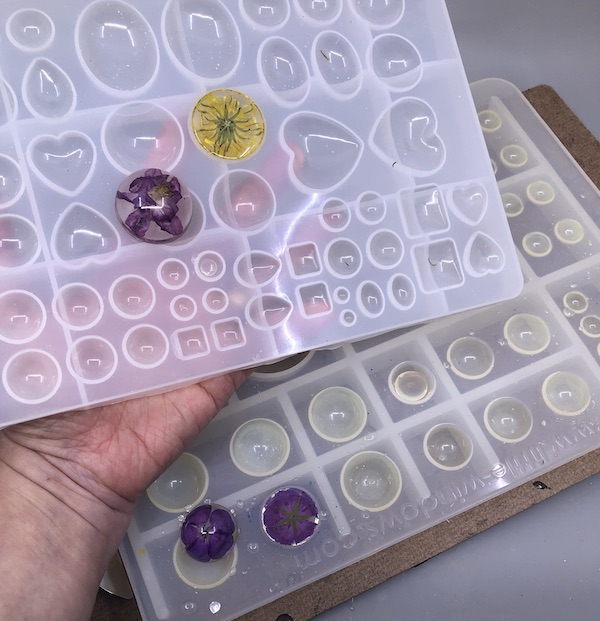
Little Windows has a great round cabochon silicone mold with many sizes. But some of the blooms I like to dry are unfortunately between sizes. So I do use other molds like this one.

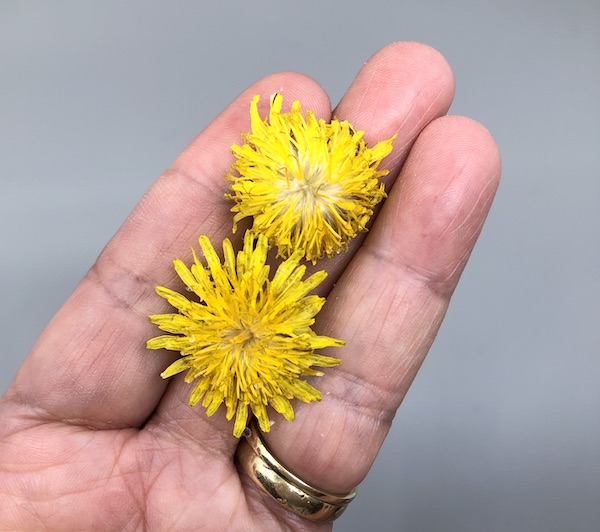
Dry more than you need. I try to pick blooms which are not too old but sometimes it is difficult to tell. You can see the difference between these two dandelion flowers after drying. The top one is clearly a bloom which is beginning to turn into the dandelion clock stage - it looks "furry" in the middle.

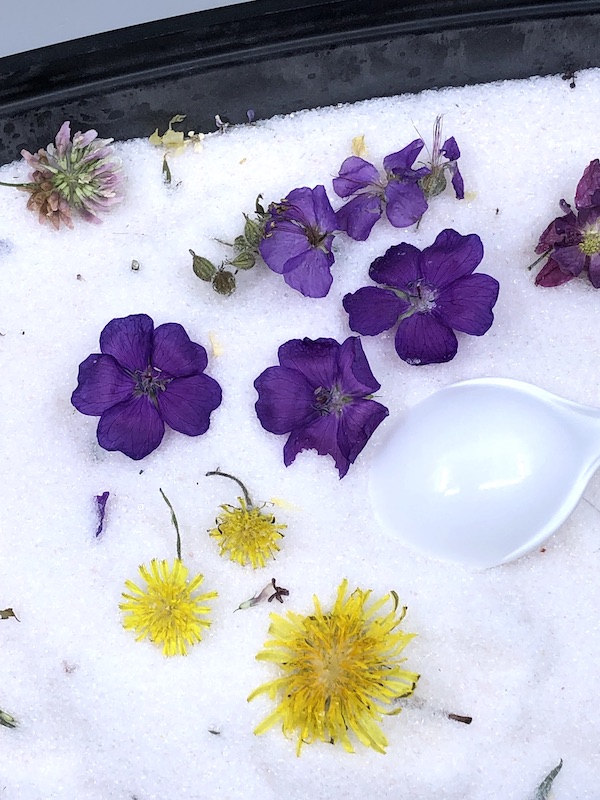
I switch to commercial silica gel for drying flowers rather than silica cat litter as the smaller grains might do less damage to small blooms which I don't wish to flatten in the microwave press. Even so, not all drying was successful - petals break off etc. So again, dry more than you need.

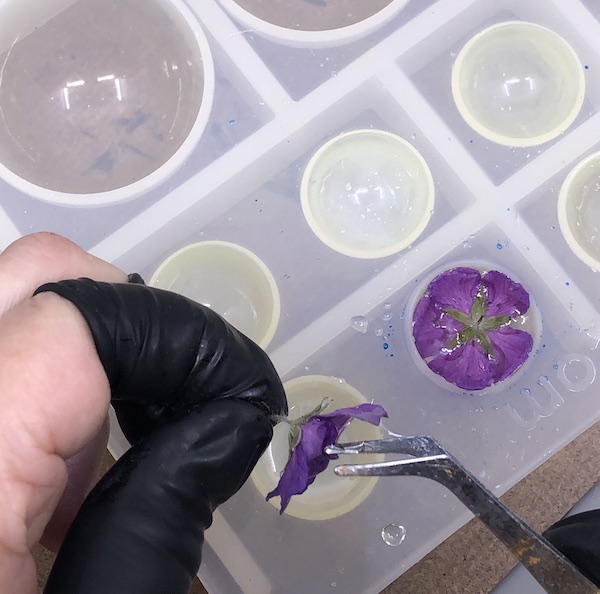
Once I dip the bloom into the first layer of resin, I gently "swish" it around, holding the stalk with tweezers. This is to make sure no air is trapped below. I do not recommend lifting the flower completely out of the resin. The petals clump together and I had a hard job trying to open up the petals again without breaking anything.


I really liked using Little Windows' new alcohol inks as you can see in this past tutorial. So I tried it for oval cabochons. Looked really pretty....

....but much was obscured once I added the flowers and leaves!! So either use a layer of colored resin or clear resin with a resin film cut out. The bright yellow flower is the marsh marigold - I bought a specimen from my local garden center for my garden.

I am guilty of impatience and when I try and hurry, mistakes happen. Bubbles are the biggest offenders. The small ones are sometimes inevitable but those at the edges can be retrieved some tape and adding more fresh resin on top - but it is more work. I did not check frequently enough during the early curing stage and a late large bubble appeared in one of my oval cabochons.
In future, I will attempt to be more patient and work with more resin layers. A bubble such as this could be covered up successfully by adding another flower in the next layer. Might be a cool thing to try to make a 3D design.

How thick an opaque background layer can be will depend on whether one wants to attach a glue on bail at the back or to drill a hole at the side for a screw eye pin.

Here is a quick refresher on how to make a simple real dandelion flower cabochon pendant - the video is on my beadinggem Instagram.
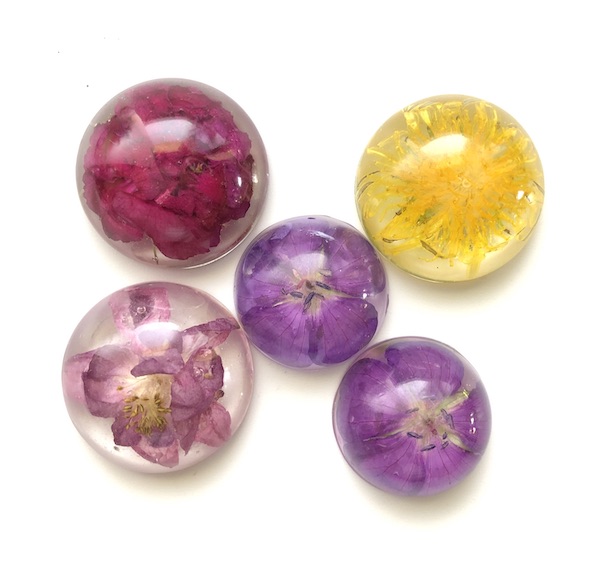
I am not sure but I suspect many people prefer clear backgrounds. Here are some examples :
The shrub rose at top left was the only 1 of 3 that I successfully dried. The bottom left is a columbine flower which is quite deep - I just cut off the bottom of the flower.


White Backgrounds
I mixed some white mica powder with resin to give it a silvery or pearlescent look. But you can also use plain white resin colorant.


These can range from the very light to dark as in black.
The background in this set was actually small glass chips embedded in the first resin layer:

The alcohol ink ones from my recent attempt :

These were done using Little Windows' black resin colorant. The small squares are a challenge for real flower resin work!

Please leave a comment below (scroll down) and let us all know which color you prefer. This will help everyone who is into real flower resin making.
Before You Go:
- How to Make Complex Real Flower Resin Cabochons and Pendants | Plant Suggestions - Garden and Neighborhood Foraging
- Sheila Willert's Real Leaf and Flower Resin Cabochons and Donuts | Paper Punch Tip
- How to Make Real Flower Resin Cabochons | Comparison of Cat Silica Crystal Litter vs Commercial Silica Gel for Drying Flowers and Leaves
Photography
I used my iPhone 8+ for final product photography in natural light. I used the Orangemonkie studio which comes equipped with LED lights - for artificial light photography in my windowless basement studio. The Foldio2 Plus is excellent . I use the Foldio3 because I need the room for tutorial photography. I also used some photo editing apps. My online class Easy Guide to Smartphone Jewelry Photography is now available. Read more about it here.
This blog may contain affiliate links. I do receive a small fee for any products purchased through affiliate links. This goes towards the support of this blog and to provide resource information to readers. The opinions expressed are solely my own. They would be the same whether or not I receive any compensation.
______________________________
Original Post by THE BEADING GEM
I prefer a clear background but I've learned that if I wear the piece where it hangs over a top the top color(s) distort the details of the flower. It needs to lay against my skin to have a better view of the flowers. (and i don't like necklaces too close to my neck) a subtle color, like the pearly look, sets off the flowers and obscures whatever garment would show through. I typically use clear for bracelets which are easier for people to see and admire. They need to get pretty close to see a pendant! :) either way... I love putting flowers in resin!!
ReplyDeleteThat is exactly the issue with clear - you cannot wear it over a colored or patterned top. I prefer a solid background of some kind. And I love working with flowers in resin too!
DeleteOoooh Pearl, this is inspiring so many ideas!!! I'm looking forward to scouring my neighborhood for blooms and having a maker weekend. I really love the ones with the swirled alcohol inks in the background, you have such a great sense of color and I love how the flowers pop. One thing I do when I have an errant bubble is use a drop or two of resin (or a whole thin Domed Up layer), to add a bee or butterfly charm. They look great hovering over the flowers and add dimension too. A mentor of mine would say "a mistake is an opportunity to get more creative!", and I live by that :) Thanks again for your thorough and motivating content!
ReplyDeletegreat idea!
DeleteI've also drilled into a bubble such as the one Pearl showed, and dripped resin into the hole, sometimes it works and sometimes it doesn't - but i figure there's nothing more to lose and it's a learning experience.
I've done that too, Cally. As you say, it is hit and miss. So I do not advise it!
DeleteI prefer a colored background but not too dark.
ReplyDeleteGood to know, Marianne! Thanks.
DeleteWhat a great tutorial! The scientist in you really shows. Another option beyond a drilled hole is to bezel it with Delicas and 15\0 seed beads. Right angle weave or netting works very well. You can also embellish the sides with firepolish beads because the sides are thick so you have lots of room.
ReplyDeleteAbsolutely! Beaded bezels will also definitely work.
Delete