I always have so much fun at Halloween as do others. Perhaps more so this year because the last two have seen normal celebrations somewhat curtailed. I don't really dress up but I have a selection of Halloween jewelry to choose from. See more tutorials in the links below.
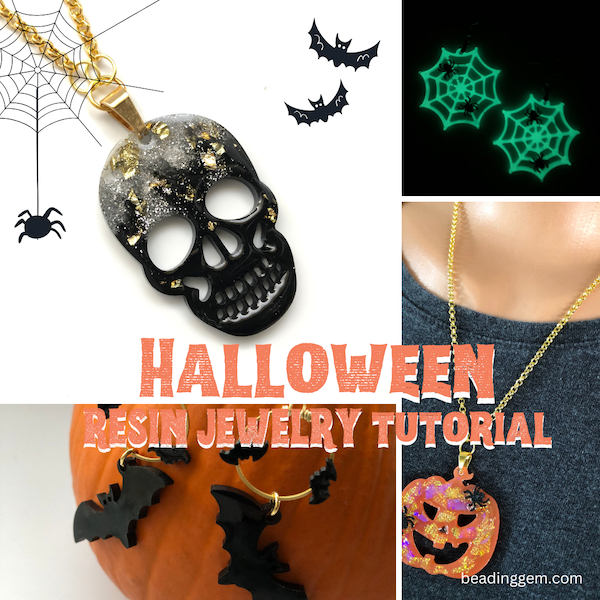
This time, I am making Halloween resin jewelry using silicone molds. These are easy to do with many options to customize them.
There is a wide variety of silicone molds out there for Halloween crafting and baking - select food safe silicone if you are planning to make edible treats. Amazon also has a whole bunch of food safe ones. I used this set of Halloween themed silicone molds - they are available in blue silicone from Southern Glitter Molds.
These molds are on the large side. Most can be pendants or statement earrings. I wasn't too keen on the BOO design as the lettering was reversed for one of the pair for some strange reason.

I also used very tiny silicone molds! These 1 cm spider and bat ones were from the Crafts and Glitter Shop which sells all kinds food safe silicone molds. You could adorn Halloween muffins with chocolate spiders and bats if you are into baking rather than resin jewelry making!!

As always, I use jewelry grade epoxy resin from Little Windows. It is non-toxic and has a longer storage life than other brands. Readers can get 15% discount with this code : BG1516. Brilliant resin cures to a clear glass like finish. Remember to do a quick microwave of Part A before mixing to reduce bubble formation.


I only have a few of these cups. So I clean and reuse them. Two wipes with dry paper towels, then a final wipe with some isopropanol (rubbing alcohol) from the drugstore, is enough to get them cleaned.

I used both the white and black resin colorants from Little Windows for different designs. These are opaque.

The hardest Halloween mold was the spider web one. I had difficulty getting the resin into the narrow bits. The best way was to work with an excess and then use an implement to push the resin in. I ran a toothpick along the recesses many times to ensure the resin went in and to eradicate bubbles as much as possible. All excess resin at the top was skimmed away using a popsicle stick.

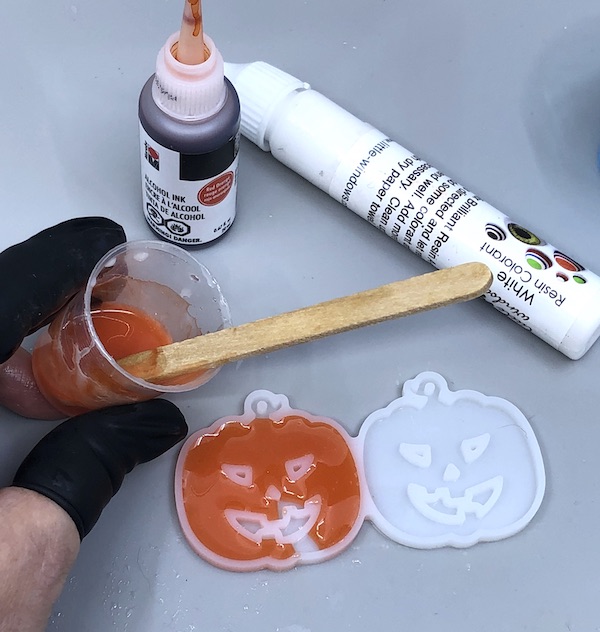
I had some white resin leftover so I colored it with the orange alcohol ink from the Little Windows set for the pumpkin.
I also use a toothpick to go over the bail loop to ensure enough resin is there and no lurking bubbles remain. I ran out of Little Windows' tiny pointy swabs which I have found to be excellent and removing bubbles.
The resin was then left under cover to cure overnight.

Little Windows has some really pretty dichro-ish film which gives the design a holographic look! I just cut up little bits from two different films and added it to the top of a second thin layer of clear resin poured on the pumpkins.

I added a little more clear resin to dome up the design.
In retrospect, this design would have played up the dichro-ish look even more had I just omitted the white colorant. Adding orange alcohol ink to clear resin would make the design transparent. One note : add a fair amount of alcohol ink. There is not a lot of pigment in alcohol ink so fading happens.
I also added two different resin colors into the same molds. Black as well as a silvery glitter color. Don't make up a lot of the latter as you have to add a goodly amount of glitter. The glitter should fully coat the stirrer.

Little Windows also have glow in the dark additives. I only have the green but there is also a blue.
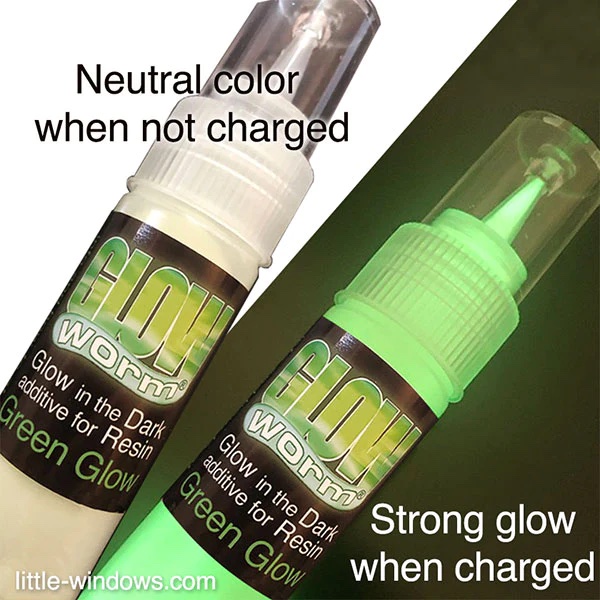
These additives are in powder form and have to be thoroughly mixed into the resin otherwise you get clumps. There was one below before I completed the mixing :

One advantage of working with glow in the dark is being able to spot insufficient resin in the molds!

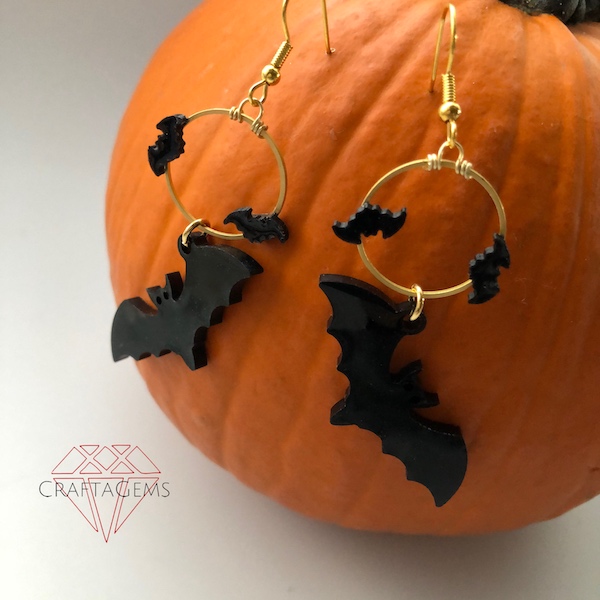
I teamed up the bats from both types of molds using 20 mm brass rings to connect the two. I placed the rings on the sticky film to keep them still while I glued on the tiny bats. The backer film is from Little Windows' Metal Rings Coaster set.

I found G-S Hypo Cement to be really good at bonding the resin bats and the brass rings. The small nozzle allowed me to glue on the small bats as well as the spiders for the other designs.
Notice the little wire work I did to connect the ear wires? I did not want to attach the rings directly to the ear wires otherwise the latter could move and hit against the bats.

Clean up of stray resin bits with a craft knife is necessary after curing. A bit of work with some designs such as the skull - all those tooth holes!

Despite my care, some bubbles did form especially on the thin web parts. The slight imperfections did not affect the integrity of the web. Real spiders do not spin perfect webs. So I think I could excuse myself here!

This was my favorite resin combination - black with silver glitter resin and then some artificial gold flakes here and there.

I got rather too enthusiastic with the ghost earrings. My first attempt consisted of glitter and sequins and resulted in a ghastly mess!

I hoped the reverse side would redeem my mistakes. But, nope. All the heavier glitter and sequins had sunk to the bottom. The ghosts look like they contracted some kind of supernatural disease!

Now the reveal......


I thought of making a statement necklace with 3 of the pendants but decided to go with single pendants instead.


I bought these resin flowers a long time ago which I glued onto the white skulls with G-S Hypo Cement for my Day of the Dead inspired sugar skull earrings. You can get all kinds of small flower silicone molds. By the way, the Mexican tradition of the Day of the Dead (Dia de Muertos) is celebrated around November 1 and 2.

Last but not least, the spider web earrings in glow in the dark and white colors. So much fun to see the glow in the dark ones change color (see video).

Photography
I used my iPhone 8+ for final product photography in natural light as well as some phone apps. I used the Orangemonkie studio which comes equipped with LED lights - for artificial light photography in my windowless basement studio. The Foldio2 Plus is excellent . I use the Foldio3 because I need the room for tutorial photography. My online class Easy Guide to Smartphone Jewelry Photography is now available. Read more about it here.
Before You Go :

This blog may contain affiliate links. I do receive a small fee for any products purchased through affiliate links. This goes towards the support of this blog and to provide resource information to readers. The opinions expressed are solely my own. They would be the same whether or not I receive any compensation.
______________________________
Original Post by THE BEADING GEM
So many cute ideas! I love the sparkly pumpkin! The flowers on the skull was great too! I like how you think.
ReplyDeleteWe think alike, eh?
DeleteYour halloween jewelry is very cute! You sure do a great job with your resin work Pearl!
ReplyDeleteThanks, Aims!
DeleteWhat fun designs! I love Halloween and have fond memories of this day from my childhood. Do you use the same silicone molds for other crafts (I mean non-food applications)? I like to make soap and don't see any problem using the same molds for resin and soap as long as they are cleaned between crafts. Do you Pearl?
ReplyDeleteYes. See this tutorial where I use molds for making beeswax thread conditioners : https://tinyurl.com/59b25pu5. However, you generally use deeper molds to make soap. So while you can reuse them for resin jewelry and don't want to make them too deep, you will have to pour to a shallower depth.
ReplyDeleteI knew you would have an answer! Thank you.
DeleteI laughed out loud at the ghost with the supernatural disease! I love the bat earrings the best, very creative!
ReplyDeleteThanks! Those are my favorites too!
Delete