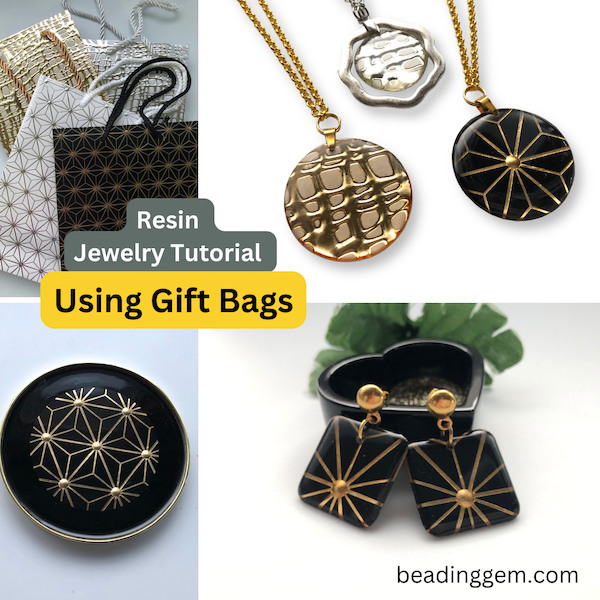
I wondered if this kind of paper might work for resin jewelry making. Paper has to be protected beforehand as contact with resin will make it translucent. So using gift bag paper might well save a step. Only one way to find out! Let's experiment!
The patterns on gift bags are very varied which means designs can be as well. I chose some from my stash which I thought had a contemporary style suitable for jewelry making.


My preferred resin is from Little Windows' Brilliant Resin ( Readers get a 15% discount by using this code BG1516). A safe resin, I also like it because it is very clear for both doming and casting. It is also a low bubble producer. Also see this post which is all about safety precautions with epoxy and uv resin.

The procedure is easy. Just follow the directions for making up the resin mix. I colored some of the resin black using the resin colorant provided by Little Windows. I also have some silver mica powder - there are many brands available. I carefully covered the backs of the cut out paper without spilling over the edges. This will be a light doming.
I covered the whole project with a plastic upcycled food container and let the resin cure overnight. Note : placing the doming tray on a clipboard makes it easy to safely move the project elsewhere if necessary.
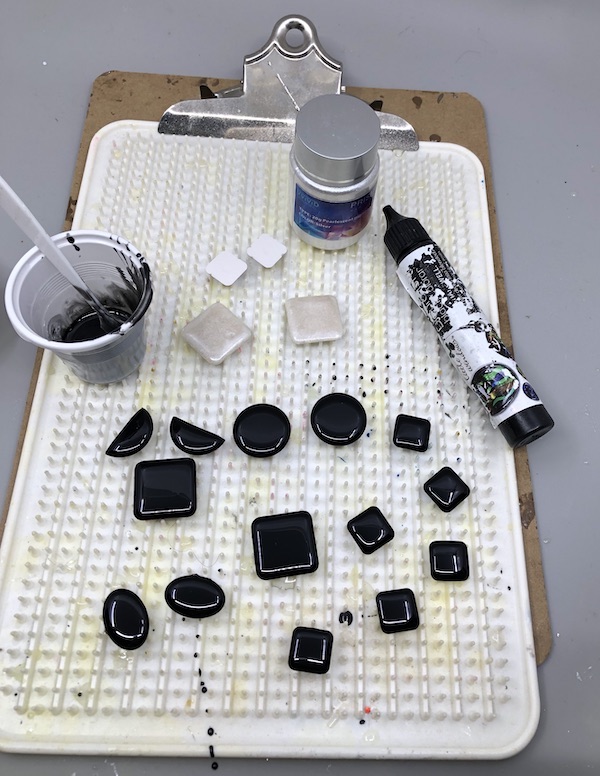


When I chose not to use holes, I used hypo cement to glue either the handmade bail or a repurposed brass finding to the resin. This glue seems best for resin in that it is very strong and durable and is less messy than E6000 due to its small applicator nozzle.

Here are the results. This medallion is actually a composite of two resin pieces. The square one was only domed on one side. It was attached with some left over clear resin. Hypo cement can also be used.


COASTER
Some time ago, Fran from Little Windows sent me their metal rings which can be used for coasters and ornaments. She has many great ideas as you can see from the video at the end.

The rings come with backer films. These as well as specialty resin tape are better than the heavy duty packing tape I have used before because they do not leave any residue. Mind you, I just use some rubbing alcohol from the drugstore to remove any residue from packing tape.

Once the protective sheet was peeled off, I pressed a ring down on the backing film. I then filled the coaster almost to the top with black resin mix - the same as I have been using for the jewelry pieces.

Once covered, and allowed to cure overnight, the backing film comes off easily. It can be reused for another project if you are careful to replace it back to its protective sheet.
Any bits of resin on the ring - I had a little seepage on one edge as well as on the top - can be easily removed. I used the plastic stirrer to help push off the cured resin bits.

I then used my 2.5 inch paper punch to get a round shape from the gift bag I was using.

I used a black maker pen to color the white edge of the cut out.

I just used a glue stick to attach the cut out to the cured resin.

This stops the paper from moving when I pour on the last layer of clear resin.
I used these tiny pointy swabs which I find more effective than toothpicks to remove any stubborn bubbles. I also pushed down on the paper cut out to make sure no bubbles remain trapped underneath since I used a relatively weak glue to attach it.

Once dried, the coaster looks rather fancy!


Fran also has an inspirational coaster and ornament tutorial.
Before You Go :
- 10 Lovely Beaded Coaster Tutorials | Gift Ideas
- How to Make Resin Jewelry Dishes with Faux Gold Leaf Flakes
- Easy Resin Pendant Tutorial Uses Digital Images

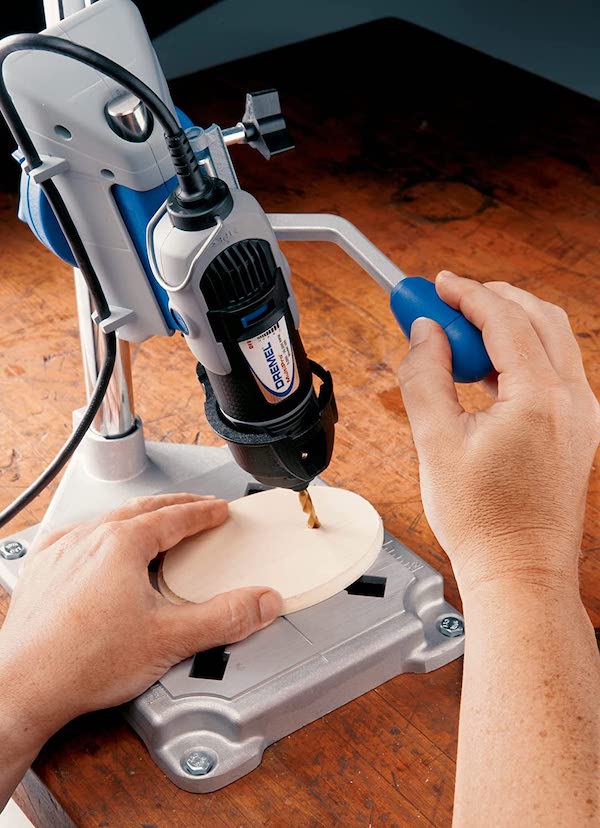
Never thought about a drill press stand for a Dremel. (I have the Black & Decker version of the same thing and a similar device may exist for those. I also have a Foredom flex shaft but those drill press stands are over $100 so I would want to make sure I was going to use it a lot before purchasing...)
ReplyDeleteYour projects turned out great!
Thanks! Since you have a flex shaft, you could just use it instead of a drill press unless you are going to make a lot and need a production line!
DeleteNice results! Process and materials tips are always appreciated. My favorite non-blingy sense of humor thing today is the mug. :)
ReplyDeleteLOL! I was wondering if anyone would notice my sly insertion of humor!
DeleteI'm better with language than fine motor skills 🙃 Chris
Deletegenius!! I'm looking at my gift bag stash with new eyes. Your bags are very snazzy! I recently ordered some of the backer film sheets from LW and I'm excited to try it instead of tape. I also ordered the tiny pointy swabs and they are indeed, tiny and pointy!
ReplyDeleteI generally like to get non-gender, non-celebratory specific bags for all sorts of gifting. I am now on the look out for more bags which can work in jewelry designs.
DeleteHello Pearl, this is amazing! The black and gold ones remind me of vintage German glass drops I have. Thanks for showing the process.
ReplyDeleteBlack and gold is a classic combination!
DeleteI love how you work so many useful tips into your tutorials! And the classy gold and black graphic look seems very on-trend right now. So elegant!
ReplyDeleteI agree, you are a creative genius! I find my favorite projects include something used in a different way, upcycled, and these bags are gorgeous in resin. I have been saving greeting cards to do the same sort of thing, now I need to dig through my bag stash for more options. Thanks for the inspiration Pearl :)
ReplyDeleteFantastic! Just love the look of texture and dimension you can get with the right gift bag print - very smart. Great job!
ReplyDelete