
Stringing is one of the easiest ways to make jewelry. Even so, there are tips and tricks to make things faster and easier as well as ensure success. Crimp bead failures, for example, are soul destroying after the effort put into designing a necklace or bracelet.
I recently made over a necklace for a lovely lady I know. Lorrie loved the vintage style necklace she bought two years ago but found the memory wire part of it uncomfortable to wear. So I changed it over to a regular beading wire.
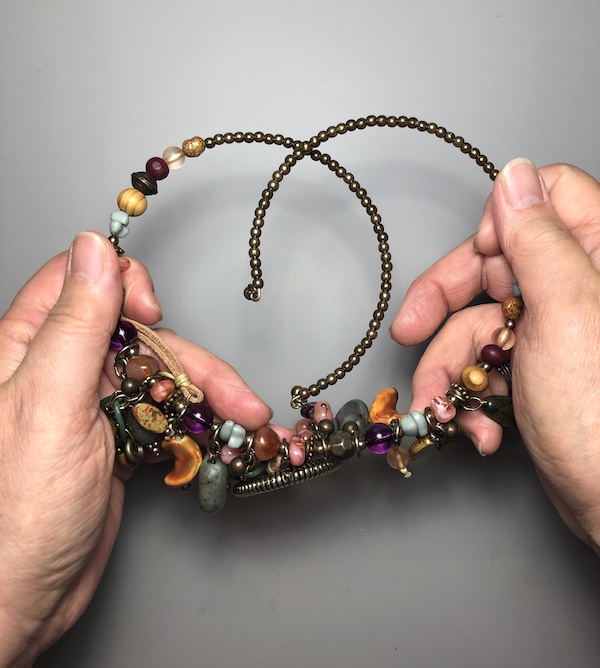
It was a complex design with lots of dangles on jump rings. But as you can see in the close-up below, these were kept in place by larger beads on either side. So long as I could pass a fresh beading wire through all the beads, the dangles stayed where they were!

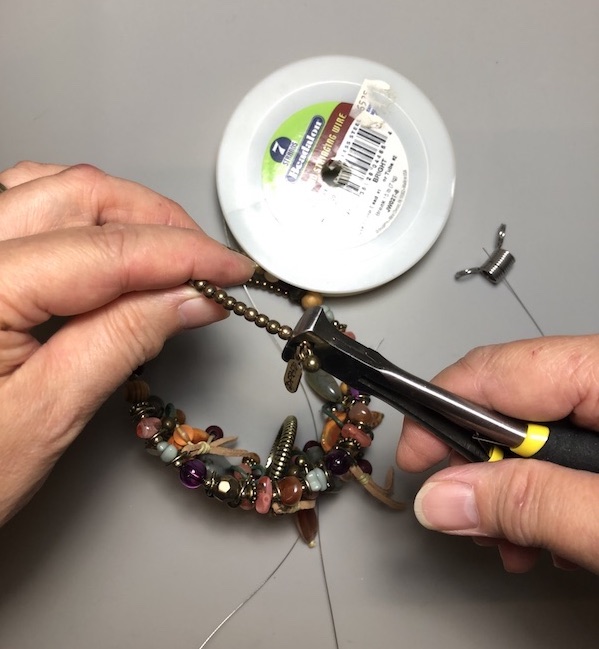
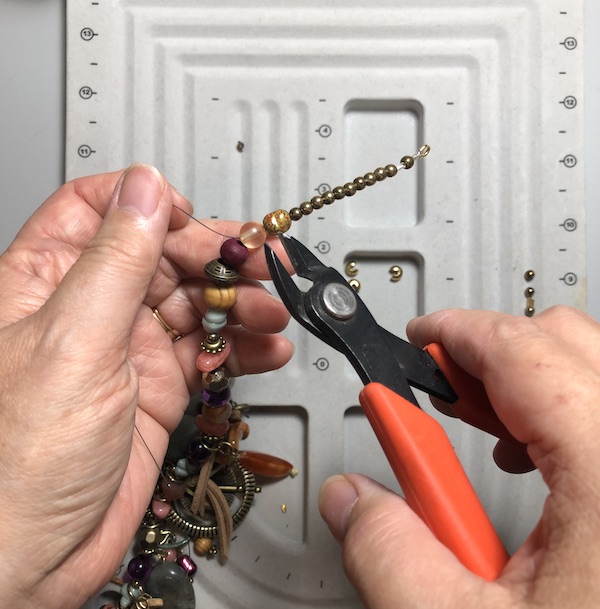
First step to get a length of beading wire. I used the #7 0.015 inch. This wire actually has a bundle of 7 wires which makes it very strong. The more wires in the bundle, the more flexible it is.
Never ever use flush cutters on memory wire and beading wire for that matter! That will ruin them for sure. Use proper wire cutters. I had trouble getting close for cutting off the memory wire end loop, so I used an end cutter or nipper.
I never had to worry about maintaining the pattern of the original necklace because I just shifted over sections to the beading wire. There is no need to completely remove the beads from memory wire and lay them in order! Incidentally, this method is the same if you need to correct a stringing mistake. Just use a fresh wire and transfer over the beads until you get to the oopsie.
I did have one dangle drop out during the transfer. That was because the jump ring was not closed properly and the exposed beading wire slipped through. Easy enough to put the dangle back on.
Then on to the bead board. There were a number of leftover beads. Had they been more than just plain seed beads, I would have made some earrings for Lorrie.

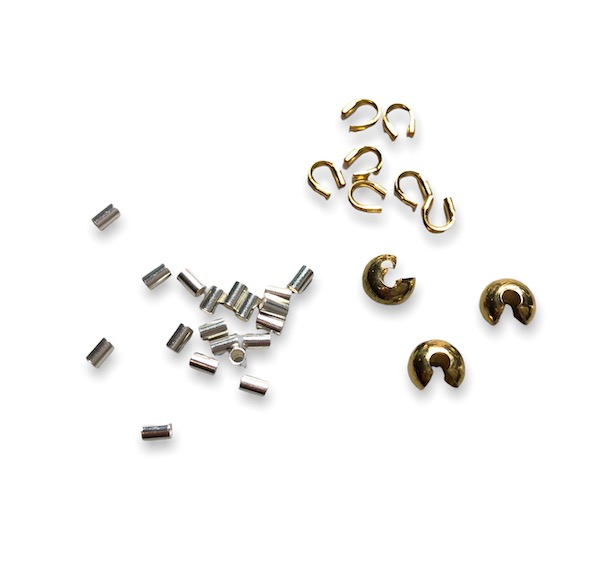
However, I always use sterling silver crimp beads. My experience has shown that the gold plated varieties are not great. Who knows what the base metal is? I have had gold plated crimp beads shatter in the past. Sterling silver is soft and crimps well over the wire.


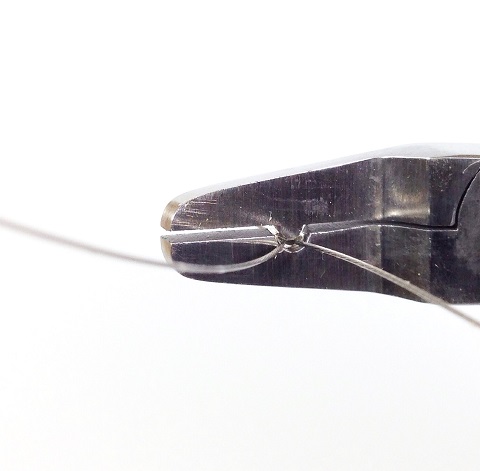

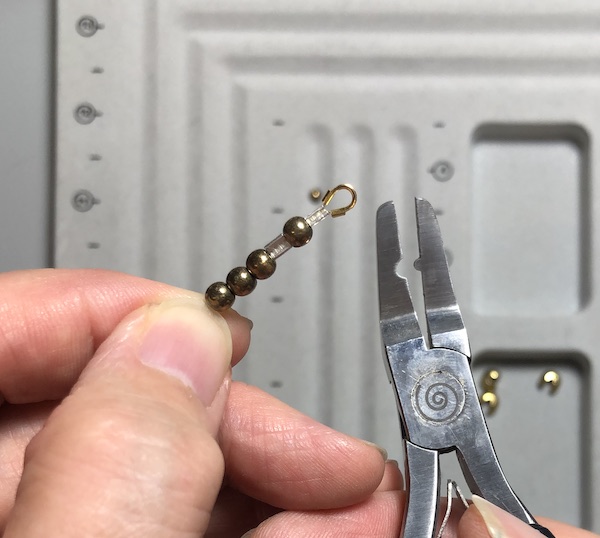
After the rounding action, the rolled over edges are evident. I then do the final flattening part.
I have stopped using the commonly available crimping pliers (on the left below) ever since the Om Tara crimping pliers came out and I got the chance to review it.
The one on the left just does not allow one to really crimp down hard on the wire although it has a nice rounding option which allows me to sometimes use it to tuck in wire ends while wire working.
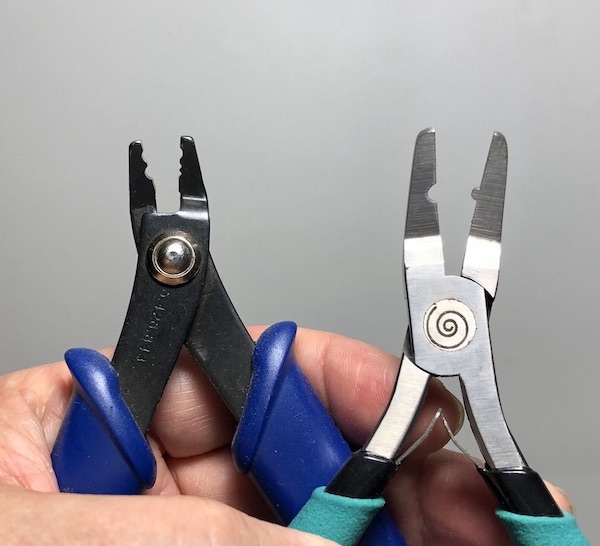
The Om Tara pliers has a good size channel with a rounded protrusion to simultaneously crimp down and curve the crimp bead.

The second action is to fold over the crimp with the flat part of the pliers.

It's a neater result and one which is more secure than the regular pliers.

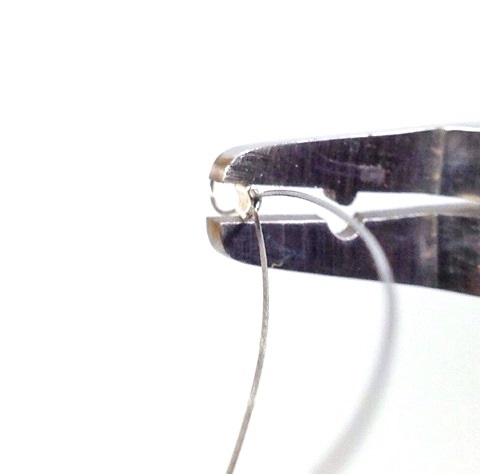
Just to be absolutely sure, I add a flattening step before I use that little channel part. You can tell I am a touch paranoiac about failed crimps!

Adding bead covers are not my favorite activity. They can be hard to close. Just two tips. Firstly, do not over tighten the wire - there should be a tiny gap to allow for the slightly larger bead covers. Secondly, close them slowly to avoid wonky closures.
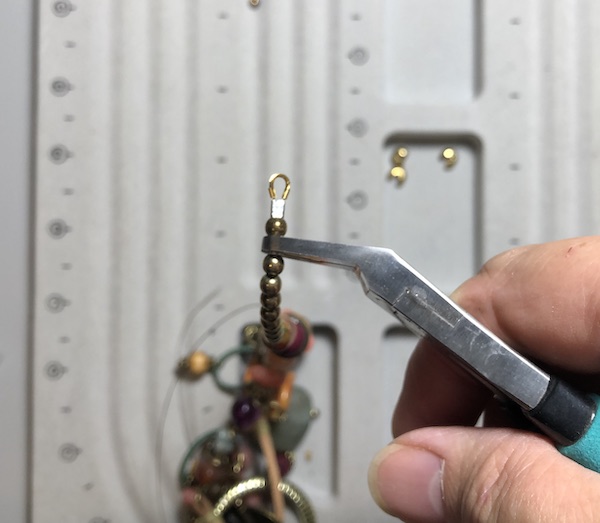
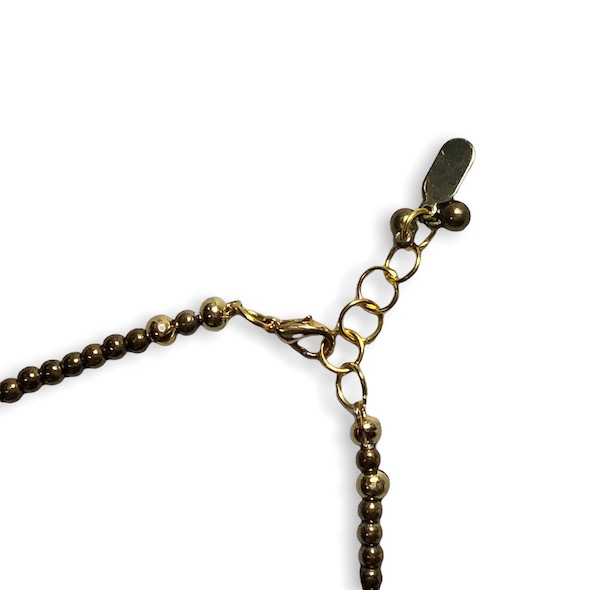
The necklace had so many dangles that I added two crimp beads on each end for extra security. (Paranoiac much, Pearl?)

One extra tip for trimming the beading wire after stringing on all the end components is to cut it around larger beads. I could do this as the design had larger beads after the small ones. It's really difficult to trim well so any short wire protruding is less likely to poke the wearer than if it is found among the small beads.
I gave Lorrie a short extension chain and replaced the little tag and beads from the original memory wire ends. She said she loves her made-over necklace even more so now that she can actually wear it in comfort!

Lorrie also had a pretty elastic bracelet with double holed metal components. The elastic had stretched with age so I replaced it.
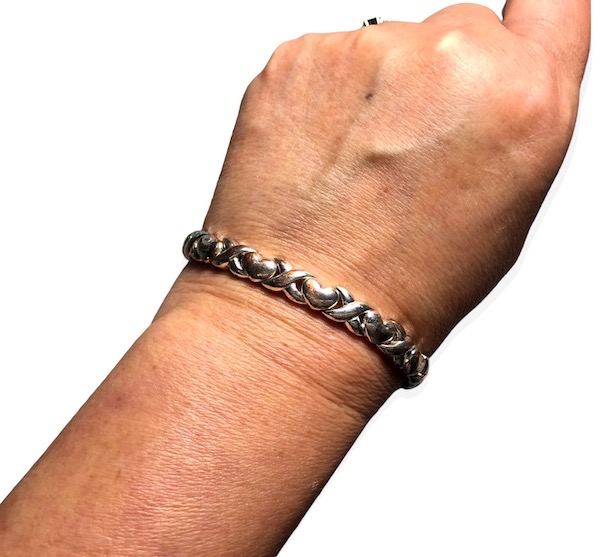
Whoever did the elastic before used just a single length, crisscrossing at the back of one metal component for the knot. I replaced it with two lengths, knotting twice behind two different components. This is for extra security - if one elastic fails, Lorrie will still have the bracelet on her wrist and not all over the floor!

Photography
As an experiment, I used my iPhone 8+ in my windowless basement studio with a 100W equivalent daylight compact fluorescent lightbulb in an anglepoise lamp. The background was an oversized grey silicone mat for crafts. I also used a phone app for whitening the background. My online class Easy Guide to Smartphone Jewelry Photography is now available. Read more about it here.
Before You Go:

This blog may contain affiliate links. I do receive a small fee for any products purchased through affiliate links. This goes towards the support of this blog and to provide resource information to readers. The opinions expressed are solely my own. They would be the same whether or not I receive any compensation.
______________________________
Original Post by THE BEADING GEM
I've had the same frustration with crimping pliers, and I've broken crimps trying to fold and flatten them. the Om Tara look more effective. the necklace is lovely, and there's such satisfaction in a beautiful, well-done job!
ReplyDeleteThank you so much for this. I learned a few things. I have never heard of the Om Tara pliers. I have the Xuron that everyone recommends and about 4-5 different brands and I don't really like any of them so I will try the Om Tara brand and hope I like them. Thanks again. Love your daily posts. Always something interesting.
ReplyDeleteNeato Ms. Paranoia!
ReplyDeleteWonderful and informative, as always! So enjoy your work in action - thanks for all the great tips and tricks! (hmmm...will have to check out Om Tara pliers, though I have one of her manuals - love her leather cord jewelry tutorials!)
ReplyDeleteAnother great informative article. Crimps are either a dream or a night mare. Thanks for the hints.
ReplyDelete